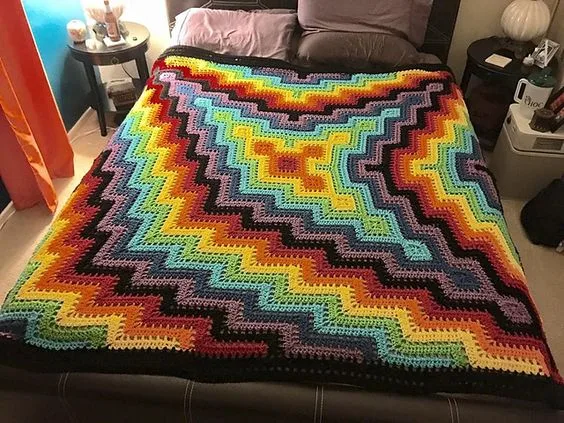
Made and counted by Wren —

Pronged Square and Ripple Blanket Crochet Pattern

Crochet a stunning pronged square and ripple blanket with bold color-block design. Free pattern with border finishing for a cozy, eye-catching throw.

IntermediateLevel
Multi-Session ProjectTime
5 mmHook
WorstedYarn
Jump to the pattern

At a glance

Crochet a set of pronged squares, working each one in rounds to build up its raised, textured pattern.

Crochet a set of ripple sections separately, using the classic wave-style increase and decrease technique.

Weave in all yarn ends on each finished square and ripple piece before moving on to assembly.

Lay out all your completed pronged squares and ripple sections in a color arrangement you love.

Rearrange the pieces as needed until the color flow and balance feel just right to you.

Join the pieces together using a tapestry needle and whip stitch, or slip stitch them with your hook.

Work the decorative border evenly around the entire joined blanket to finish the edges cleanly.

Weave in any remaining ends and give the finished blanket a light block for a polished result.

About this pattern

This Pronged Square and Ripple Blanket is a fabulous mash-up of two beloved crochet techniques — textured pronged squares and classic wave-like ripple sections — combined into one show-stopping throw. What makes it so special is the way it lets you play with color; the sample uses eight vivid shades from Cherry Red to Medium Purple and Black, creating a patchwork effect that's playful, bold, and totally unique every time you make it. It's perfect for crocheters who love variety in their projects and want a blanket that never feels monotonous to work on.

You'll get to practice two distinct motif styles here: the pronged square, worked in rounds with a raised textured stitch pattern, and the ripple section, which uses the classic increase-and-decrease wave technique. Both come together with a decorative border round for a polished finish. This is an intermediate-friendly project — you should be comfortable with basic increases, decreases, and joining rounds — and because it's assembled from smaller pieces, it's wonderfully portable and easy to pick up in short sessions rather than needing hours at a stretch.

The finished blanket is a true heirloom-quality throw, generously sized for a couch or bed depending on how many squares and ripple panels you make. The mixed texture of smooth ripple waves against the raised pronged squares gives it a rich, tactile quality that photographs beautifully and feels even better wrapped around you. With its cheerful multicolor palette, this blanket makes a spectacular housewarming gift, a bright nursery accent, or a treasured keepsake for someone who loves color as much as you do.

Variations

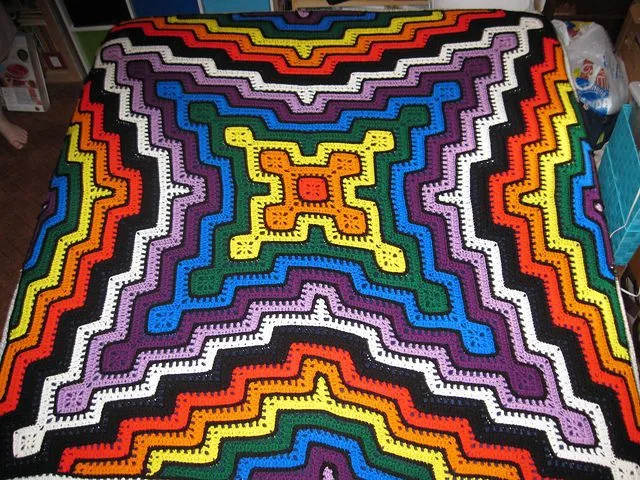
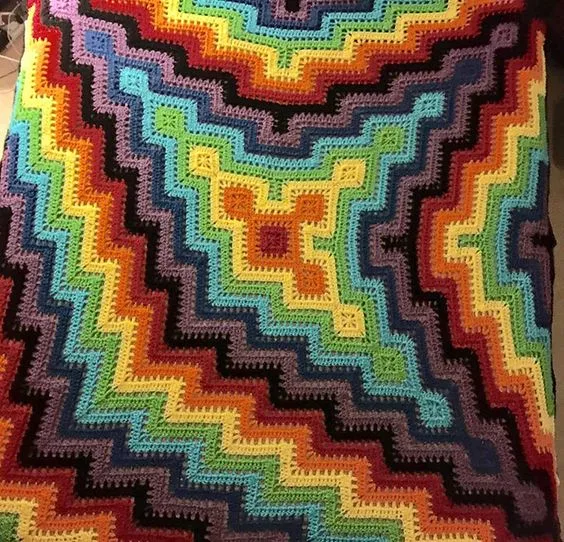
This pattern is a dream for customization because every square and ripple panel is its own little color canvas. For a coastal-inspired throw, swap the eight-color rainbow palette for just Turqua, Blue, Spring Green, and white or cream — you'll get a calm, ocean-wave feel that pairs beautifully with the ripple sections' natural wave motion. Want something moodier and more sophisticated? Try a jewel-tone palette of Medium Purple, Cherry Red, and Black with metallic gold accents worked into alternating pronged squares for a rich, autumnal look. For a nursery version, stick to soft pastels like blush, mint, and buttery yellow instead of the bold brights, and consider making a smaller lovey-sized version using just four pronged squares and two ripple panels sewn into a mini blanket. If you're working from stash yarn, this pattern is the perfect stash-buster — Super Saver or Vanna's Choice both work beautifully in worsted weight and come in dozens of shades, so you can mix and match without buying anything new. To make the blanket larger for a bed-sized throw, simply crochet more pronged squares and ripple sections in the same qty-1, 3-round and qty-1, 2-round configurations before assembling — the modular construction means you can scale up infinitely. You could also alternate the layout pattern itself: try a checkerboard arrangement of squares with ripple strips running as sashing between them, or create an ombré effect by arranging your colors from lightest to darkest across the blanket. For a themed gift, choose a recipient's favorite team colors or house colors and build the whole blanket around that two- or three-color story instead of using all eight.
Common mistakes

  • Inconsistent tensionCrochet a test square and a test ripple swatch first, and measure them against each other before committing to your full set — adjust your hook size on one piece if needed so both motifs finish at matching dimensions.
  • Losing track of which round you'reUse a stitch marker to mark the start of each round on both the pronged squares and ripple sections, and jot down a simple tally on paper or a pattern-tracking app as you complete each piece.
  • Not weaving in ends before assemblyWeave in and trim every yarn tail on each individual pronged square and ripple section as soon as it's finished, before it ever joins the pile of completed pieces awaiting assembly.
  • Randomly laying out the squaresLay all finished pieces on the floor or a design wall first and step back to view the full arrangement, swapping pieces around until the color flow feels balanced before you pick up your tapestry needle.
  • Using a loose, uneven whip stitchWork your whip stitches close together and consistent in tension, matching the same spacing used across all seams so the blanket surface lies flat without puckering or gapping.
  • Skipping the border round or adding itWork all 3 rounds of the border evenly around the entire perimeter after assembly, keeping stitch count consistent at the corners so the border doesn't pull or ruffle.

The pattern

Written out round by round

Materials

Yarn

  • Choose medium weight yarn in multiple colors.

Crochet Hook

  • Size H/8 (5 mm) recommended.

Scissors

  • For cutting the yarn.

Tapestry Needle

  • For weaving in ends and assembling parts.

Abbreviations

  • ch = chain
  • st = stitch
  • sl st = slip stitch
  • sc = single crochet
  • dc = double crochet

1. Create the Pronged Squares

Start by crocheting the pronged squares that will form part of the blanket.

  1. Round 1Chain (ch) 4 , slip stitch (sl st) to the first chain to form a ring. Chain 3 (counts as first double crochet), 11 double crochet (dc) into the ring. Join with a slip stitch to the top of the beginning ch -3.
  2. Round 2Chain 3 , 1 dc in the same stitch, *chain 3 , skip the next dc, 2 dc in the next stitch*, repeat from * to * around, ending with chain 3 , slip stitch to the top of the beginning ch -3.
  3. Round 3Slip stitch to the first chain -3 space , chain 3 , 2 dc in the same space , chain 2 , 3 dc in the same space ( first prong made), * 3 dc in the next chain -3 space , chain 2 , 3 dc in the same space *, repeat from * to * around, slip stitch to the top of the beginning ch -3.

2. Crochet the Ripple Sections

Next, create the ripple sections to complement the pronged squares.

  1. Row 1Chain a multiple of 12 + 3. Double crochet (dc) in the fourth chain from the hook and in the next 3 chains, *skip 2 chains, dc in the next 4 chains, chain 2 , dc in the next 4 chains*, repeat from * to * across. Turn.
  2. Row 2Chain 3 (counts as first dc), dc in the next 3 stitches, *skip 2 stitches, dc in the next 4 stitches, chain 2 , dc in the next 4 stitches*, repeat from * to * across. Turn.Repeat Row 2 for the desired length of the ripple section.

3. Assemble the Blanket

Once you have enough pronged squares and ripple sections, it's time to assemble your blanket.

Step 1 Lay out the pronged squares and ripple sections in a pattern you like.

Step 2 Using a tapestry needle, sew the squares and ripple sections together with a whip stitch or slip stitch them together with your crochet hook.

4. Add a Border

Finish your blanket with a beautiful border to give it a polished look.

  1. Round 1Single crochet evenly around the entire blanket, working 3 sc in each corner. Join with a slip stitch to the first sc.
  2. Round 2Double crochet in each stitch around, working 3 dc in each corner stitch. Join with a slip stitch to the top of the beginning ch -3.
  3. Round 3Chain 1 , single crochet in each stitch around. Join with a slip stitch to the first sc.

Important notes

💡 Stick with a size H/8 (5 mm) hook throughout both the pronged squares and ripple sections so all your motifs come out a matching size and join together seamlessly.

💡 Since this pattern uses eight different colors, organize your yarn by motif before you start — bag up the exact colors needed for each pronged square or ripple section to avoid mid-round color hunting.

💡 Block your finished pronged squares and ripple panels before assembly; a light steam block helps flatten curling edges and makes the whip stitch or slip stitch joining much easier and neater.

💡 Keep a small notebook or phone note tracking how many pronged squares versus ripple sections you've completed, since the modular design makes it easy to lose count partway through a big project.

💡 When whip stitching pieces together, work with the right sides facing you so you can watch your seam and immediately catch any missed stitches or gaps as you go.

💡 Save your longest, cleanest yarn tails from each motif specifically for assembly — a generous 12-18 inch tail on each piece means you won't have to start new yarn mid-seam.

More photos

Pronged Square and Ripple Blanket Crochet Pattern — photo 2
Pronged Square and Ripple Blanket Crochet Pattern — photo 3
FAQs

Frequently asked questions

What yarn weight works best for this blanket?

This pattern is designed for medium (worsted) weight yarn paired with an H/8 (5 mm) hook. Sticking to worsted weight across all eight colors ensures your pronged squares and ripple sections come out a consistent, matching gauge.

How many pronged squares and ripple sections do I need to make a full-size blanket?

That depends entirely on the finished size you want, since this is a modular pattern built by repeating the pronged square and ripple pattern parts. Lay out a few finished pieces first to gauge how large each one is, then calculate how many you'll need to reach your target blanket dimensions.

Should I whip stitch or slip stitch the pieces together?

Both methods work well — whip stitching with a tapestry needle gives a subtle, nearly invisible seam, while slip stitching hook creates a slightly raised decorative ridge between motifs. Choose whip stitch for a smoother finish or slip stitch if you like a more textured, defined grid look.

Can I use fewer than eight colors?

Absolutely — the eight-color combination in the sample is just one option, and this pattern is very color-flexible. Two, three, or four colors arranged thoughtfully across your pronged squares and ripple sections will look just as striking, especially if you're using stash yarn.

What's the best way to plan my color layout before assembling?

Lay every finished pronged square and ripple section out on the floor in your desired arrangement before sewing anything together. This lets you rearrange colors freely and check the overall balance, so you won't be stuck unpicking whip stitches later if a color combination doesn't work.

One at a time —

Get the next pattern

Tested round by round before it is sent. No spam.