Made and counted by Wren —

How To Crochet The Zig Zag Puff Stitch: A Textured Stitch Tutorial

Learn the zig zag puff stitch with this easy step-by-step guide. Create texture-rich blankets, scarves, and accessories with this fun crochet technique.

IntermediateLevel
4-6 HoursTime
WorstedYarn
Jump to the pattern

At a glance

Start by chaining a foundation length long enough for your desired project width.

Work your first row of puff stitches across the chain to establish the base texture.

Begin shifting puff placement in the following row to start forming the diagonal zigzag shape.

Continue alternating between the two puff placement rows to build the zigzag pattern upward.

Repeat this two-row sequence until your piece reaches the length or size you want.

Adjust puff spacing as needed along the way to keep the zigzag lines looking consistent.

Finish the piece with a row of single crochet for a clean, tidy edge.

Weave in any loose ends and block gently to help the texture settle evenly.

About this pattern

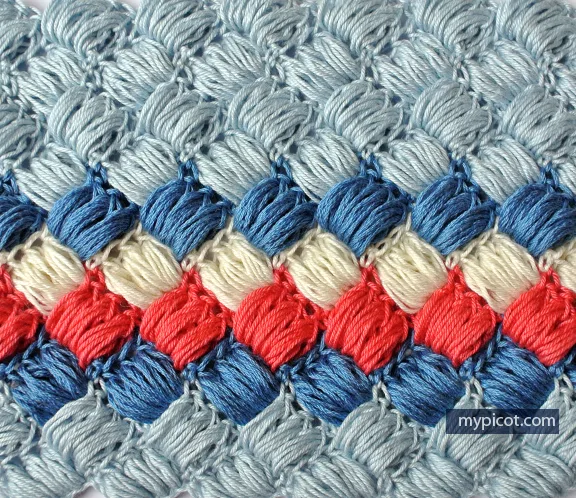
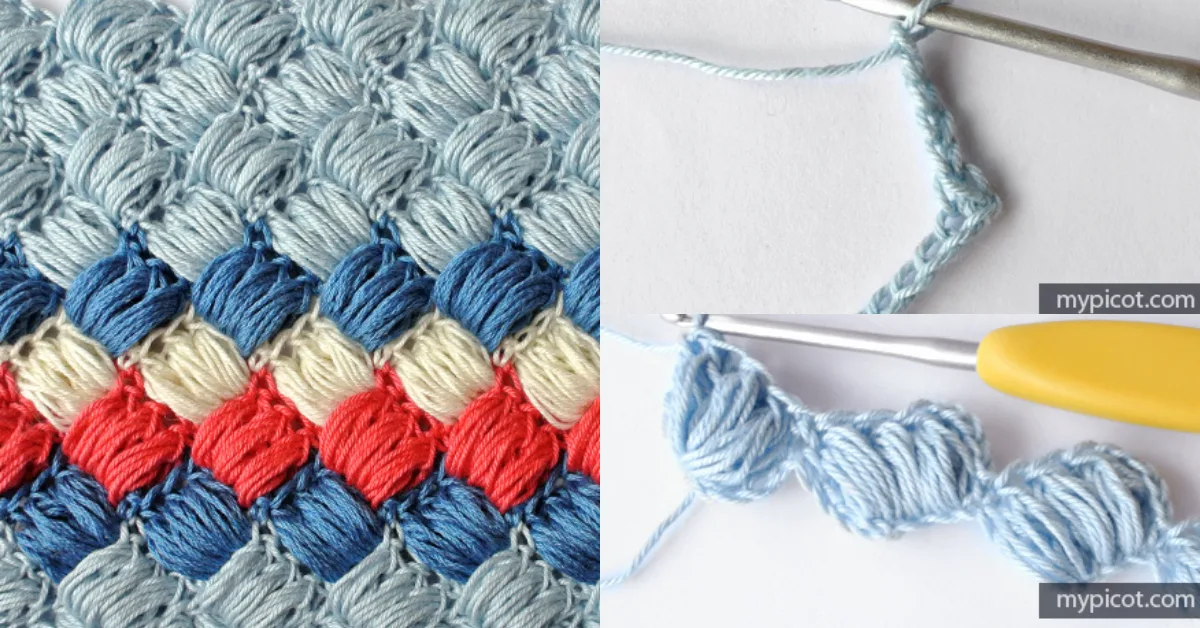
The Zig Zag Puff Stitch is a gorgeous textured pattern that turns simple rows into a rippling, dimensional fabric full of personality. By combining classic puff stitches with a shifting diagonal placement, this stitch creates a bold zigzag motif that catches the eye and adds serious tactile appeal. It's a fantastic choice for anyone who loves chunky, cozy textures and wants to move beyond basic single or double crochet into something a little more eye-catching, whether you're planning a blanket, a scarf, or a statement accessory.

This pattern relies on a foundation chain, puff stitch construction, and careful placement shifts across rows to build the signature zigzag. You'll want to be comfortable with basic puff stitches (yarn over, insert hook, pull up a loop, repeat, then close) before diving in, though the repeat itself is very learnable even if you're newer to textured stitches. Expect to spend a few hours getting the rhythm down and working up a solid sample — most crocheters find the pattern becomes intuitive after the first couple of repeats.

The finished fabric has a wonderfully plush, ridged texture that looks far more complex than it actually is to make. It drapes with more body than flat single crochet, making it ideal for warm blankets, cushy scarves, and cozy accessories that need to hold their shape. Worked in a soft worsted weight yarn, this stitch pattern makes a beautiful handmade gift — the kind of textured piece people love to touch and admire.

Variations

This stitch is incredibly versatile once you've got the rhythm down! For a bold, graphic look, try alternating two contrasting colors every few rows — think charcoal gray and mustard yellow, or navy and cream, so the zigzag really pops against itself. Caron Simply Soft or Vanna's Choice both work beautifully here since they're smooth enough to let the puff texture shine without fighting for attention. If you want something extra plush, swap in a chenille or velvet yarn like Bernat Baby Velvet for a scarf that feels like a hug. For a lighter, drapier version, drop down to a DK weight yarn and a smaller hook — this softens the zigzag into a more subtle ripple, lovely for baby blankets or lightweight wraps. Want a bigger statement piece? Simply extend your foundation chain in multiples that match your puff repeat, and keep working Rows 3 and 4 until you reach your desired blanket width, adding as many puff bands as you like. You can also play with puff height by adjusting how many times you yarn over before closing each one — more yarn overs means taller, fluffier puffs, while fewer keeps things neater and more subtle. For a seasonal twist, work the whole piece in a single earthy variegated yarn so the color shifts naturally highlight the zigzag movement without any color-change fuss. And if you're making a scarf, consider adding a simple single crochet border in a contrasting color around the entire finished piece to frame that gorgeous texture.

I'm genuinely obsessed with how much personality this stitch packs into such a simple repeat! There's something so satisfying about watching those puffs stack up diagonally, row after row, until suddenly the zigzag just appears like magic. I love that this pattern is forgiving too — if your puffs are a little wonky at first, nobody will notice once the full zigzag effect takes over. The technique of yarning over extra times before closing each puff is my favorite little trick here; it lets you completely customize how fluffy and dramatic your texture looks, which means no two projects ever turn out quite the same. Finishing with that clean row of single crochet is such a small step but it makes the whole piece look polished and intentional, like you really know what you're doing (even if this is your first time trying puffs!). Honestly, this is the kind of stitch that makes people stop and ask 'wait, how did you DO that?' — and that satisfaction alone makes it worth learning.
Common mistakes

  • Losing track of puff stitch placementUse a stitch marker to mark the first puff of each row so you always have a clear reference point for where the diagonal shift should begin.
  • Pulling puff stitches too tightKeep your closing yarn over loose and deliberate — give the loops a little room before pulling through so the puff stays rounded and dimensional.
  • Inconsistent number of yarn oversDecide on your yarn over count before you start (2-3 is standard) and stick with it for every single puff so the texture stays uniform across rows.
  • Miscounting the foundation chainCount your foundation chain twice before starting Row 1, and consider marking every 10th stitch with a locking stitch marker to make recounting easy.
  • Forgetting to shift puff placementPause after each row and visually check that your puffs are stepping diagonally rather than stacking directly on top of the previous row's puffs.
  • Skipping the final single crochet rowAlways finish with the clean single crochet row as instructed — it stabilizes the edge and gives the whole piece a professional, finished look.

The pattern

Written out round by round

Materials

  • Worsted weight yarn
  • Crochet hook (size to suit your yarn)

Abbreviations

  • sc = single crochet
  • dc = double crochet
  • puff = puff stitch

Step 1: Begin with a Foundation Chain

Foundation Row : Start by chaining a multiple of 6 stitches plus 2 (e.g., 18 + 2 for practice). This will ensure the zigzag pattern lines up evenly across the rows.

  1. Row 1SC in the second chain from the hook and across the row to set a foundation row. Turn your work.

Step 2: Create the First Row of Zig Zag Puffs

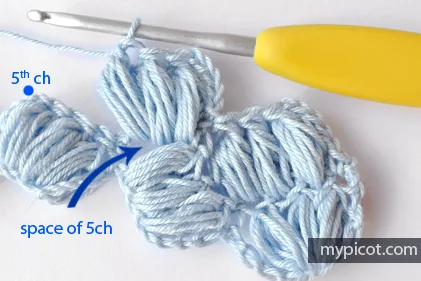
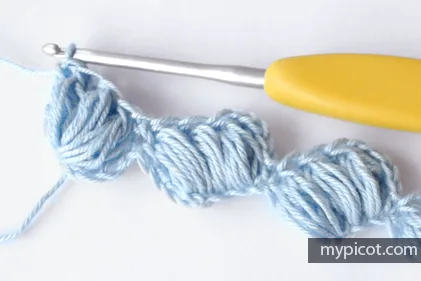
  1. Row 2(Puff Row): Chain 3 (counts as your first DC). Skip 2 stitches, DC in the next stitch. Now, work a puff stitch in the same stitch.Skip 2 stitches, DC in the next stitch, and repeat the puff stitch in the same stitch.Repeat this pattern across, and end with a DC in the last stitch. Turn your work.

Step 3: Work the Zig Zag Effect

  1. Row 3Chain 1, SC in each stitch across the row. Turn your work.
  2. Row 4(Offset Puff Row): Chain 3 (counts as your first DC). Skip the next stitch, DC in the following stitch , then work a puff stitch in the same stitch.Continue across, placing your puff stitches in the spaces between the puffs from the previous row.End with a DC in the last stitch, and turn your work.

Step 4: Repeat Rows

  1. Rows 5+Rows 5 and Beyond: Repeat Row 3 and Row 4 until you reach your desired length.Adjust your puff stitch placements to keep the zigzag pattern consistent.Finish with a row of single crochet to create a clean edge.

To make the puffs extra fluffy, yarn over more times before pulling through to close each puff. You can experiment to find the look you like best!

Important notes

💡 Choose a hook one size larger than you'd normally use for the yarn weight — puff stitches tighten up fabric quickly, and a larger hook keeps your texture soft and open.

💡 Place a stitch marker at the start of every row until the zigzag rhythm feels automatic; it's the easiest way to avoid losing your place mid-puff.

💡 Practice your puff stitch tension on a small swatch first — inconsistent tension is the number one reason zigzag patterns look uneven.

💡 If you're experimenting with extra yarn overs for fluffier puffs, test just one puff first to make sure your yarn amount and gauge still work for your project size.

💡 Worsted weight yarn is ideal for showing off this texture clearly — thinner yarns can make the zigzag harder to distinguish, especially from a distance.

💡 Block your finished piece gently after completing the single crochet edge; light steam blocking helps the puffs relax into an even, polished zigzag pattern.

More photos

How To Crochet The Zig Zag Puff Stitch: A Textured Stitch Tutorial — photo 2
How To Crochet The Zig Zag Puff Stitch: A Textured Stitch Tutorial — photo 3
How To Crochet The Zig Zag Puff Stitch: A Textured Stitch Tutorial — photo 4
FAQs

Frequently asked questions

What yarn weight works best for the Zig Zag Puff Stitch?

Worsted weight yarn is ideal because it shows off the puff texture clearly without being too bulky. A smooth, non-splitty yarn will also make the puff stitches easier to work cleanly.

Can I use this stitch for a scarf instead of a blanket?

Absolutely — simply chain a narrower foundation and repeat Row 3 and Row 4 until you reach your desired scarf length. Finishing with the single crochet edge gives it a clean, wearable finish.

How do I keep my puff stitches from looking uneven?

Consistent tension is key, so try to pull each loop of the puff to the same height every time. Practicing on a small swatch before starting your full project helps a lot too.

Why does my zigzag pattern look more like straight columns?

This usually means the puff placement wasn't shifted correctly between Row 3 and Row 4. Double-check that each row's puffs step diagonally rather than lining up directly over the previous row.

How many times should I yarn over when making each puff?

Two to three yarn overs is standard and creates a nicely defined puff. You can experiment with more for a fluffier, more dramatic texture, just keep it consistent throughout your project.

One at a time —

Get the next pattern

Tested round by round before it is sent. No spam.