Made and counted by Wren —

Easy pumpkin coaster crochet pattern in four rounds

5mm hook, worsted acrylic yarn works a round pumpkin coaster with optional curly leaf in 4 rounds.

Easy pumpkin coaster crochet pattern in four rounds
BeginnerLevel
1-2 hoursTime
WorstedYarn
Jump to the pattern

About this pattern

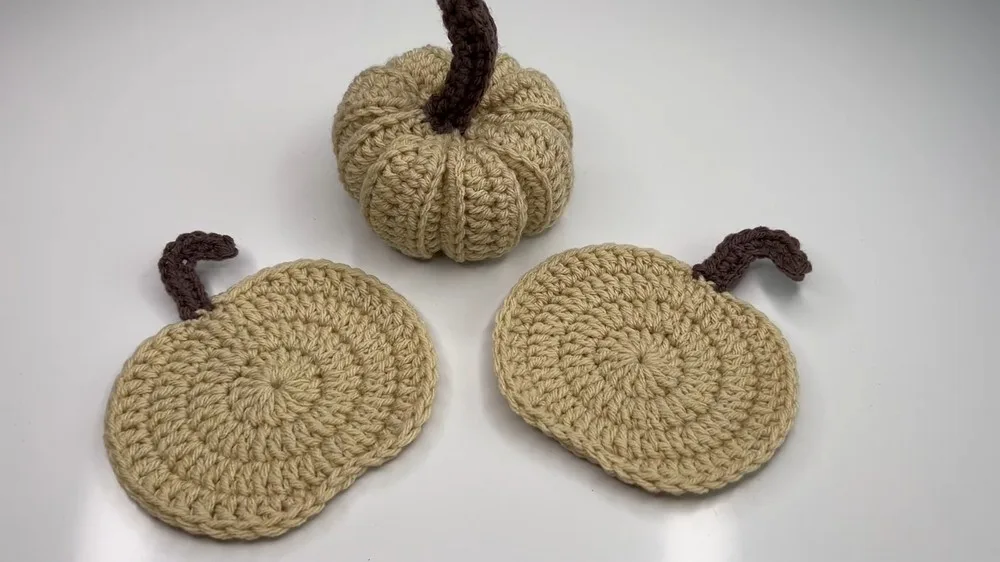
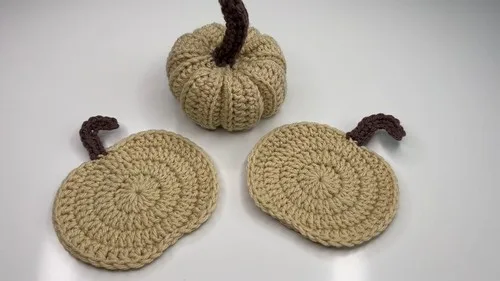
A flat, round crochet coaster shaped like a pumpkin, worked in 4 rounds from a magic ring with a 5mm hook and worsted acrylic yarn. Round 1 sets 15 dc, doubling to 30 then 45 by round 3, and round 4 swaps plain increases for a mixed sc-hdc-dc sequence that pulls in the pumpkin ridges. An optional 1-row curly leaf and stem, worked from a 10-chain, finishes it in a second color. Sized to sit under a standard coffee cup.

This coaster works flat in the round from a magic ring, building 15 dc in round 1 up to 45 dc by round 3, then shaping into a pumpkin outline with a mixed sc, hdc, and dc round 4 instead of continuing plain increases. A 5mm hook and worsted acrylic keep the fabric firm enough to hold a mug without stretching. The optional curly leaf and stem add a single 10-chain row worked back down itself, in a second color if desired. The stitch count that matters most is the 45 dc close at round 3 — get that wrong and round 4's shaping sequence will not line up.
The pattern

Written out round by round

Materials

  • 5 millimeter crochet hook
  • Scissors
  • Darning needle
  • 100% acrylic yarn (in two colors or as desired)
  • A normal coffee cup (for size reference)

Abbreviations

  • dc = double crochet
  • hdc = half double crochet
  • sc = single crochet
  • sl st = slip stitch
  • ch = chain
  • yo = yarn over

Pumpkin Body

Begin with a magic ring, then chain two (this chain does not count as a dc).

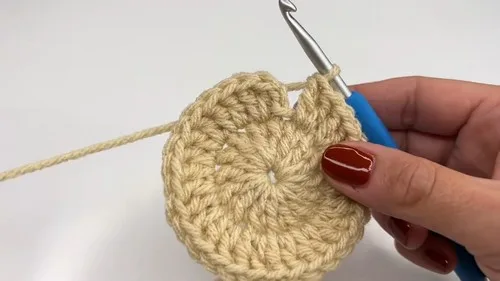
Round 1Ch 2 (does not count as a dc). Work 15 dc into the magic ring (yo, insert hook into ring, yo and pull through to create three loops on hook, yo and pull through two loops, then yo and pull through the remaining two loops). Pull the magic ring tail tight to close the circle. Sl st into first dc to join. (15 dc)
Round 2Ch 2 (does not count as a dc). 2 dc in same st and in each st around. Sl st into first dc to join. (30 dc)
Round 3Ch 2. *2 dc in first st, 1 dc in next st; repeat from * around. Sl st into first dc to join. (45 dc)
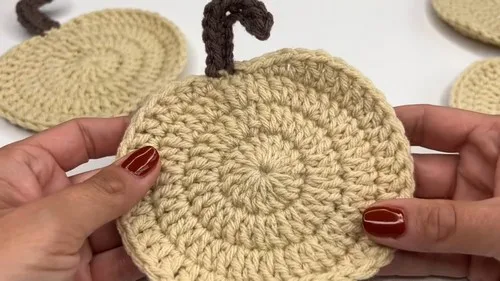
Round 4Sl st in first st, sc in next st, hdc in next st, dc in next 16 sts, hdc in next st, sc in next st, sl st in next 3 sts. Repeat this sequence for the other side of the round. Complete the round with hdc and sc in the subsequent stitches, ending with a sl st.

Leaf and Curly Stem (Optional)

Change to the desired color for the stem or leaf.

Row 1Ch 10. Sc back down the chain, working 2 sc in some stitches to create a curved effect for the leaf.

Assembly

Step 1Chain one and cut the yarn, leaving a long tail. Pull the tail through the loop to secure.
Step 2Use a darning needle to weave in the ends securely.
Step 3Attach the new color yarn for the leaf and stem with a sl st to the spot where the pumpkin body was finished off.
Step 4Fasten off the leaf and stem and weave in the ends.

Tester's notes

5mm hook: hold this size steady through rounds 1-3, since a tighter hook shrinks the 45-dc round 3 diameter below the coffee-cup reference.

15 dc in round 1 must be exact before the sl st join — an extra or missing stitch compounds through round 2's doubling to 30 and round 3's increase to 45.

A stitch marker in the first stitch of each round helps track the join point, since round 4 changes stitch type (sc, hdc, dc) partway around and it's easy to lose the start.

Color changes for the leaf and stem happen at the join where the pumpkin body finishes off; carry the new color in on a sl st rather than cutting and rejoining, per the assembly steps.

No stuffing is used in this pattern — the coaster lies flat by design, so skip any urge to add fill that would cup the fabric.

Work in progress

Easy pumpkin coaster crochet pattern in four rounds — photo 2
Easy pumpkin coaster crochet pattern in four rounds — photo 3
Easy pumpkin coaster crochet pattern in four rounds — photo 4

At a glance

Rounds5
Parts2
LevelBeginner
Time1-2 hours
YarnWorsted

Gauge check

After round 1, count all 15 dc before joining with the sl st — a miscount here throws off every later round's stitch total.

Stitch-count checkpoints

  • Pumpkin Body · Round 1: 15 sts
  • Pumpkin Body · Round 2: 30 sts
  • Pumpkin Body · Round 3: 45 sts

If something looks wrong

The coaster cups instead of lying flat.
Round 4's sc-hdc-dc sequence was likely worked too tightly or a stitch was skipped, pulling the outer edge in. Rip back to the round 3 sl st join and re-work round 4 at a looser tension, matching stitch counts on both sides of the round.
The finished piece is smaller or larger
Hook tension, not the stitch counts, is the usual cause. Re-swatch rounds 1-3 with a half-size hook change up or down and re-check against the cup before continuing to round 4.
A visible ridge or step shows where each round joins.
The sl st join is pulled too tight compared to the surrounding dc stitches. Work the joining sl st with the same tension as the last dc of the round, or work it slightly looser.
The curly leaf lies flat instead of curling.
The 2-sc increases along the 10-chain are spaced too evenly. Cluster the extra sc stitches at one section of the chain rather than spreading them out, which forces the curl.

Yarn substitutions

Worsted-weight cottonProduces a stiffer, more absorbent coaster that holds its round shape better under a cup; use the same 5mm hook and expect slightly less stitch give than acrylic.
DK-weight acrylic or cotton blendShrinks the finished round below the coffee-cup reference size; drop to a 4mm hook to keep stitches dense enough to stay flat.
Bulky-weight acrylicEnlarges the coaster past a single coffee cup's base and softens the drape; move up to a 6mm hook and expect round 3's 45-dc count to spread wider than the pattern's reference size.
FAQs

Questions

Can this coaster hold a hot mug without deforming?

Yes — the worsted acrylic and 5mm hook keep the fabric dense enough to support a coffee cup, which is the size reference given in materials. Avoid substituting a much thinner yarn without also sizing down the hook, or the fabric will be too loose to hold shape under weight.

Is the leaf and stem necessary to finish the coaster?

No, it is listed as optional. The pumpkin body is complete and functional as a coaster after round 4 and weaving in ends; the leaf and stem row is a single additional step for a second color.

How is the second color added for the leaf without cutting the first yarn oddly?

Join the new color with a sl st exactly where the pumpkin body was fastened off, per the assembly steps. Work the 10-chain and its return sc row, then chain one, cut with a long tail, and pull the tail through the last loop to secure before weaving in.

One at a time —

Get the next pattern

Tested round by round before it is sent. No spam.