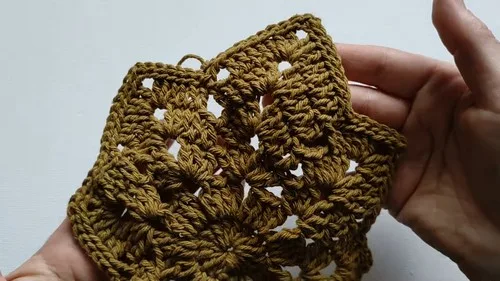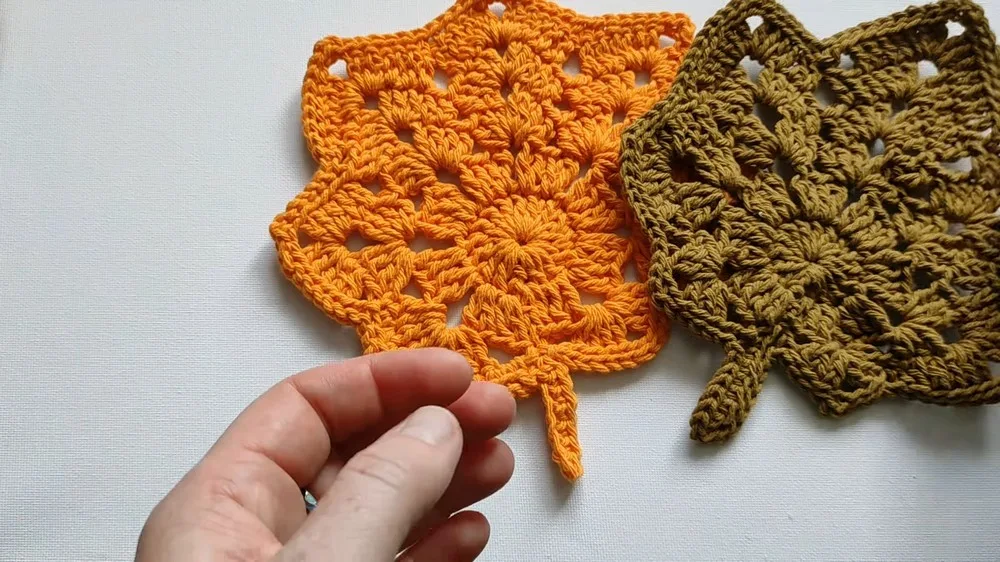
Made and counted by Wren —

Crochet Maple Leaf Pattern for Table Decor

Learn to crochet a maple leaf table decor piece with this easy pattern using magic rings, double crochets, and chain picots for autumn charm.

Crochet Maple Leaf Pattern for Table Decor
IntermediateLevel
2-3 HoursTime
WorstedYarn
Jump to the pattern

At a glance

Begin with a magic circle and work an initial round of double crochets to form a tidy, tight center.

Pull the magic circle closed firmly, then slip stitch to join and lock in your base round of stitches.

Start the next round by working two double crochets into stitches to begin building outward increases.

Add chain-3 spaces between increase groups so the fabric starts curving into pointed lobe shapes.

Continue working increase rounds, always joining with a slip stitch to keep each round neatly closed.

Watch the lobes lengthen and separate more clearly as you progress through the six total rounds.

Finish your final round, fasten off, and weave in all loose ends securely with a yarn needle.

Lightly shape or block the finished leaf so its points lie flat and even for table display.

About this pattern

This crochet maple leaf pattern turns a simple magic circle into a beautifully textured leaf shape that's perfect for dressing up your table this season. The pointed lobes and chain-space veining give it that authentic maple silhouette, making it a standout piece whether you scatter a few across a runner or tuck one into a napkin ring. It's especially lovely for anyone who loves bringing handmade warmth into their home decor without committing to a huge project.

You'll start with a magic loop base built up with double crochets, then shape the iconic leaf points using strategic increases and chain-3 spaces that form the lobes. This is a great project for confident beginners ready to level up, or intermediate crocheters looking for a satisfying quick make. Expect to spend around 2-3 hours from start to finish, working through six rounds that transform a tight little circle into a full leaf shape.

The finished maple leaf has a nicely dimensional, textured look thanks to the thick cotton yarn, giving it sturdy body that holds its shape beautifully on a table. It's compact enough to use as a coaster-style accent yet detailed enough to catch the eye as a centerpiece embellishment. Made in a rich fall palette, it also makes a thoughtful handmade gift for the host who loves seasonal styling.
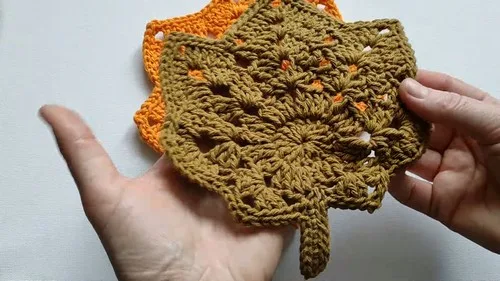
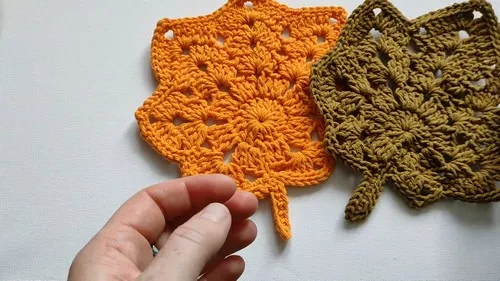
Variations

There's something so satisfying about watching a plain magic circle blossom into a recognizable maple leaf shape round by round! I love how the ch-2 stitches quietly double as your first double crochet, keeping the edges clean without any bulky turning chains standing out. The increases worked into the same stitch to create those two dc's are where the leaf really starts to take shape, and the chain-3 spaces between them are what give it that iconic pointed lobe look everyone recognizes instantly as a maple leaf. Pulling that magic ring tight at the very start is one of my favorite moments in any pattern — it's the difference between a leaf with a tidy little center and one with an awkward gap. Working with a thick cotton yarn for this project means the stitches stay crisp and defined, so all that lovely texture from the double crochets really shows off. It's a small enough make that you can finish it in an afternoon, but it feels like a genuinely finished, polished piece the moment you weave in that last end. Honestly, once you make one, you'll want a whole pile for your table.

Common mistakes

  • Not pulling the magic loop tight enough after the first round of double crochets.Give the tail a firm, steady tug right after your last stitch of round one and before you slip stitch to close — check that there's no visible gap in the center before moving forward.
  • Losing track of which stitch is the original ch-2 when it's time to slip stitch and close the round.Drop a stitch marker directly into the top of the ch-2 the moment you make it, so you always know exactly where to slip stitch back into.
  • Working the 2 dc increases into the wrong stitch, which distorts the leaf's symmetry.Count stitches carefully as you go and use a marker to flag every increase stitch so the lobes come out evenly spaced and matching on both sides.
  • Making the chain-3 spaces too loose or too tight, which throws off the shape of the leaf points.Keep your tension consistent by chaining with the same hand pressure you use for your double crochets, and lay the piece flat periodically to check the points look even.
  • Using a thin or drapey yarn instead of a thick, sturdy cotton, resulting in a floppy leaf that won't hold its shape on the table.Stick with a thick, machine-washable cotton yarn as specified, since its body and stiffness are what let the leaf sit nicely without curling or collapsing.
  • Forgetting to weave in the tightening tail from the magic circle, leaving a loose end that can unravel the center.Weave that tail in securely with a yarn needle back through several stitches on the wrong side before trimming, double-checking the center stays cinched.

The pattern

Written out round by round

Materials

  • Thick Caton Yarn (machine washable)

Hook size

  • Not specified in the video

Tools

  • Scissors
  • Yarn needle

Abbreviations

  • ch = chain
  • st = stitch
  • sts = stitches
  • sl st = slip stitch
  • dc = double crochet

Steps

  1. Round 1Make a magic loop or magic circle. ch 2, this counts as the first dc. dc 15 in the circle.Pull the tail to tighten the circle. sl st in the first ch 2 to complete the round.

You should have 16 sts.

  1. Round 2ch 2, this counts as the first dc. 2 dc in the first st. ch 3. 2 dc in the next st.Repeat the last 2 rows until you have 16 sts. sl st in the first ch 2 to complete the round.For Round 3: ch 2, this counts as the first dc. dc in the first ch-3 space. ch 3. dc in the next ch-3 space.Repeat the last 2 rows until you have 16 sts. sl st in the first ch 2 to complete the round.
  2. Round 4ch 2, this counts as the first dc. skip the first 2 sts. 2 dc in the next st. ch 3.2 dc in the next st.Repeat the last 2 rows until you have 12 sts. sl st in the first ch 2 to complete the round.
  3. Round 5ch 2, this counts as the first dc. skip the first 2 sts. 2 dc in the next st. ch 3.2 dc in the next st.Repeat the last 2 rows until you have 8 sts. sl st in the first ch 2 to complete the round.For Round 6: ch 2, this counts as the first dc. skip the first 2 sts.2 dc in the next st. ch 3.2 dc in the next st.Repeat the last 2 rows until you have 4 sts. sl st in the first ch 2 to complete the round.
  4. Round 7ch 2, this counts as the first dc. skip the first 2 sts. 2 dc in the next st. ch 3.2 dc in the next st.Repeat the last 2 rows until you have 2 sts. sl st in the first ch 2 to complete the round.
  5. Round 8ch 2, this counts as the first dc. skip the first 2 sts. 2 dc in the next st. ch 3.2 dc in the next st.Repeat the last 2 rows until you have 1 st. sl st in the first ch 2 to complete the round.Fasten off and weave in the ends.

Important notes

💡 Use a hook sized appropriately for thick cotton yarn — going up half a size from what you'd use for acrylic worsted can help keep your double crochets from feeling too tight and stiff.

💡 Always double-check your stitch count after round one — you should have exactly 16 stitches before moving into the increase round, since an incorrect count here throws off the whole leaf shape.

💡 Place a stitch marker in the very first ch-2 of every round so you never lose track of where to slip stitch to close, especially once the lobes make the stitches harder to count visually.

💡 Block your finished leaf lightly with a warm iron or steam once complete — thick cotton holds a crisp shape well and blocking helps flatten it perfectly for table display.

💡 Keep your tension even across all the 2-dc increase stitches so each lobe of the maple leaf matches in size — uneven tension here is the most common cause of a lopsided leaf.

💡 If making multiples for a table runner or garland, work all your magic rings the same way each time to keep the leaf centers consistent in size across the set.

More photos

Crochet Maple Leaf Pattern for Table Decor — photo 2
Crochet Maple Leaf Pattern for Table Decor — photo 3
Crochet Maple Leaf Pattern for Table Decor — photo 4
FAQs

Frequently asked questions

What size hook works best for this maple leaf pattern?

Since the pattern uses thick cotton yarn, a hook in the 5.5mm to 6mm range typically gives the best stitch definition. Always crochet a small test round first to make sure your tension feels right and adjust up or down as needed.

How many rounds does this maple leaf pattern have?

This pattern is worked in six rounds total, starting from a magic circle and building outward into the pointed lobe shape. Each round builds directly on stitch counts from the one before, so it helps to complete them in order without skipping ahead.

Is this pattern good for confident beginners, or is it strictly intermediate?

It's a great next step for confident beginners who already know magic rings and basic increases, though it's labeled intermediate because of the shaping involved in forming the lobes. If you've made a few amigurumi or motifs before, you'll likely find this very manageable.

How do I use this crochet maple leaf for table decor exactly?

You can lay individual leaves flat as accent pieces along a table runner, tuck one into a napkin fold, or stack several to make a small centerpiece cluster. Because the thick cotton yarn holds its shape well, the leaves sit nicely without needing stiffening spray.

One at a time —

Get the next pattern

Tested round by round before it is sent. No spam.