Made and counted by Wren —

Crochet Lily of the Valley Swing Flower Pattern for Home Decor

Crochet a delicate Lily of the Valley swing flower using magic circles, increases, and picot-style petals for charming handmade home decor accents.

Crochet Lily of the Valley Swing Flower Pattern for Home Decor
IntermediateLevel
3-5 HoursTime
Light WorstedYarn
Jump to the pattern

At a glance

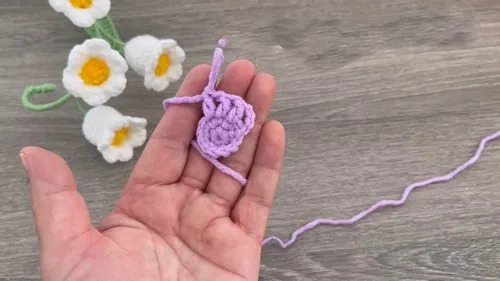
Begin with a snug magic circle and work six single crochets into it to form the flower's tiny center.

Close the ring with a slip stitch join, creating a solid, hole-free base for the rounds to come.

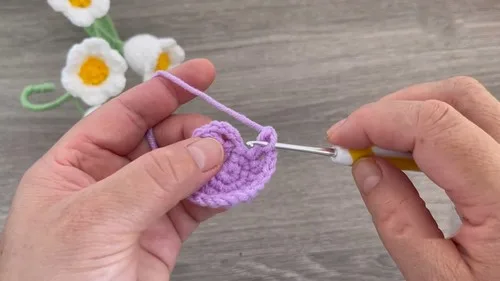
Work a full round of increases, doubling your stitch count evenly to open the circle wider.

Add another round of increases to build the base out to its full working size before petals begin.

Transition into the petal round by chaining four to stand in for your first double crochet and chain space.

Work double crochet, chain one, double crochet groups around the circle to form each individual pointed petal.

Join the petal round smoothly and weave in ends so the flower center stays neat and gap-free.

Complete the coordinating flower component, then follow the two assembly steps to bring the pieces together as a swing flower.

About this pattern

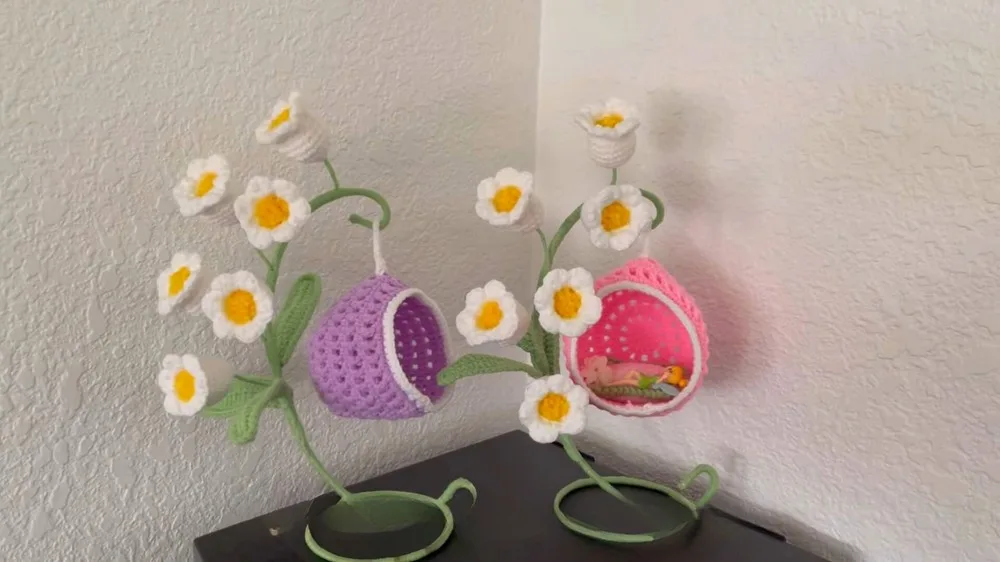
This Lily of the Valley swing flower pattern turns a simple magic circle into a delicate, dimensional bloom that captures the sweet, bell-shaped charm of the real flower. Built up in rounds with strategic increases and finished with dainty picot-style petals, it's the kind of small-scale project that makes a big decorative impact. It's perfect for crocheters who love working tiny botanical details and want a fresh addition to their home decor rotation.

The pattern relies on core amigurumi-adjacent skills: starting a tight magic circle, working single crochet increases evenly around a growing circle, and transitioning into a petal round using chain-4 and chain-1 spaces to create that classic dc-chain-dc petal shape. With a main pattern spanning seven rounds plus a separate flower component and two assembly steps, this sits comfortably in intermediate territory — expect roughly three to five relaxed hours from first stitch to finished piece.

The finished swing flower is compact, textured, and full of character, with a rounded base that flares into pretty petal points reminiscent of nodding lily bells. It has a soft, huggable feel thanks to the yarn's natural drape, and its small size makes it endlessly versatile — clip it onto a wreath, perch it on a shelf, or bundle a few together as a handmade housewarming or Mother's Day gift that feels thoughtful and personal.
Variations

I fell for this pattern the moment I finished that first magic circle and watched six single crochets snap into a perfect little ring — there's something so satisfying about that tidy foundation. Working the increase rounds from 6 to 12 stitches and beyond feels almost meditative, each round blossoming a little wider like the flower is growing right in your hands. But my favorite part is the petal round: chaining 4 to stand in for a double crochet plus a chain, then working dc, chain 1, dc into each stitch to create those little pointed petals. It's a technique that looks far more advanced than it actually is, and I love handing a finished flower to someone and watching them assume I spent all day on it. With a main pattern of seven rounds plus a coordinating flower component, this project builds real confidence with shaping and picot-style edges. It's compact enough for an evening on the couch but detailed enough to feel like a genuine accomplishment. If you've been wanting to move beyond basic amigurumi shapes into something more botanical and delicate, this is exactly the pattern to start with.

Common mistakes

  • Magic circle left too loose after the first round of single crochetsPull the tail firmly before working your first stitch and again after completing all 6 single crochets — cinch it closed completely so there's no visible hole at the center of your flower.
  • Losing track of increase placement between the 6-to-12 and the following 4-increase roundsPlace a stitch marker at the join point (the slip stitch) at the start of every round, and count stitches after each increase round before moving on — you should have exactly 12, then 16 total stitches before starting the petal round.
  • Forgetting that chain 4 counts as a stitch when starting the petal roundRemember the first chain-4 stands in for one double crochet plus a chain-1 space — don't work an extra dc into that same stitch, or your petal count will be thrown off and petals will look uneven.
  • Working the dc-chain-1-dc petal group into the wrong stitchSkip a stitch between each petal group as the pattern requires; work the group directly into the next stitch and count carefully so petals stay evenly spaced around the circle.
  • Petals curling instead of lying flat and openCheck your tension isn't too tight on the chain-1 spaces within each petal — a slightly looser chain there lets the petal open into a nice rounded point rather than pulling inward.
  • Joining slip stitches worked too tightly, creating a visible seamWork your join slip stitch with the same tension as your other stitches, and consider using an invisible join (weaving the tail through the top loops) on the final round for a seamless finish.

The pattern

Written out round by round

Materials

  • Light Worsted weight yarn
  • Crochet hook (size to suit your yarn)

Abbreviations

  • sc = single crochet
  • hdc = half double crochet
  • dc = double crochet
  • inc = increase

Main Pattern

  1. Round 2Chain 1. Make 6 increases (inc) around the circle, ending with 12 single crochets.Continue with 4 more increases.Slip stitch to join.
  2. Round 3Chain 4 (counts as 1 double crochet [dc] + 1 chain). In the next stitch, make 1 dc, chain 1, 1 dc.Continue with 1 chain and 1 dc in the next stitch.Finish with 1 chain and slip stitch on the 3rd chain.For Round 4: Chain 1.1 single crochet in the same space, inc in the next stitch.1 sc in the next chain-1 space, sc on top of the dc, inc in the chain-1 space.Repeat all the way around and slip stitch to join.
  3. Round 5Chain 4. Skip a stitch, make 1 dc, chain 1. Repeat from to all the way around. Slip stitch on top of the 3rd chain to join.Round 6 - 7: Repeat the pattern established in Rounds 4 and 5, adjusting as necessary for the stitch count.For Round 8: Make a total of 6 sc, then 1 increase.Repeat this pattern around the circle.
  4. Round 9Chain 4. Skip a stitch, 1 dc, chain 1. Repeat from to all around. Slip stitch on the top of the 3rd chain to join.
  5. Round 10Make 1 sc in each stitch around. For Rounds 11 - 15: Repeat Rounds 9 and 10, alternating until you have completed Round 15.
  6. Round 16Add wire, 22 gauge recommended. Chain 1, then make 6 sc. Follow with 1 decrease (decreasing single crochet two together).Repeat the pattern of 6 sc and 1 decrease around.Finish by cutting the wire to secure.
  7. Round 17Change color (to white, or as desired), making 1 sc in each stitch around. Finish with a slip stitch.

Flowers

  1. Round 1Start with a magic circle and chain 1.
  2. Round 2Make 6 sc in the circle, then close and leave a space for the stem.In the second round, make 6 increases.(6)
  3. Round 3Continue with a pattern of single crochet and increases as specified (usually 1 sc followed by an inc), up to 7 rounds.(1)
  4. Round 4Form petals with a combination of sc, half double crochet (hdc), and dc as described, for a total of 6 petals.

Assembly

Step 1

Attach flowers and leaves to the main piece as directed.

Step 2

Wrap the stem with yarn, securing with glue as needed.

Important notes

💡 Use a hook one size smaller than you'd normally choose for your yarn weight — a tighter gauge keeps the magic circle center tidy and prevents gaps between petals.

💡 Count your stitches after every single round, especially through the two increase rounds, since even one missed increase will throw off how evenly the petals sit around the flower.

💡 Keep a stitch marker in the joining stitch of each round so you always know exactly where your round begins and ends, which matters most once you reach the petal round.

💡 Block your finished flower by lightly steaming or pinning the petals open and letting it dry flat — this helps the chain-1 spaces hold their shape instead of curling shut.

💡 If making multiple flowers for a cluster or swing arrangement, work them all in one sitting so your tension stays consistent and the finished pieces match in size.

💡 Weave in tails as you finish each round rather than leaving it all for the end — with such a small piece, loose tails can easily get tangled into your next stitches.

More photos

Crochet Lily of the Valley Swing Flower Pattern for Home Decor — photo 2
Crochet Lily of the Valley Swing Flower Pattern for Home Decor — photo 3
FAQs

Frequently asked questions

What yarn weight works best for this Lily of the Valley pattern?

A light worsted or DK weight yarn gives the most balanced, true-to-life scale for this flower. Cotton yarn is especially nice for home decor pieces since it holds its shape well and gives the petals a crisp, structured look.

How many stitches should I have after the increase rounds?

You should have 12 single crochets after the first increase round and 16 total after the second round of 4 more increases. Counting at each stage keeps your petal round evenly spaced around the circle.

What does chain 4 counting as a double crochet plus chain mean?

It means the chain 4 you work at the start of the petal round replaces working an actual double crochet plus a separate chain-1 stitch in that spot. You'll treat the top of that chain-4 as your first 'stitch' when you join at the end of the round.

Can I make this flower without the swing assembly for a flat applique?

Absolutely — the main flower and petal rounds stand beautifully on their own as a flat decorative piece. Simply skip the two assembly steps and use the finished flower as an applique on bags, pillows, or wearables.

How do I keep the petals from curling inward as I work?

Keep your tension slightly relaxed on the chain-1 spaces within each petal group so they have room to open flat. Blocking the finished flower with light steam also helps train the petals into their proper open shape.

One at a time —

Get the next pattern

Tested round by round before it is sent. No spam.